When I was a kid, we always had homemade yogurt. My parents grew up in India and it was just part of the daily routine. At some point we switched to buying it at the store and it never phased me one way or the other. My parents have started making it at home again, and I decided it's time to give it a try. It's actually really simple and cheaper than buying it at the store. Here's what you'll need:
 Double boiler (can use just a regular pot, but be careful not to burn the milk)
metal spoon
kitchen thermometer
milk (any fat content will work, I used non-fat)
yogurt starter (any plain yogurt with active cultures)
 If you're using a double boiler, boil the water with your spoon in the pot to sterilize it. Since you're going to be leaving your milk out for 7 hours, you don't want to "contaminate" it
.
I don't actually know how necessary this is. I read that you should do this, but my parents don't and never have.
 Add your milk to a pot and bring the milk to 185F while stirring. If you don't use a double boiler, you have to be very careful not to burn the milk.
 Place the pan with the milk in a bowl of cold water and allow it to cool to 110F. Make sure to stir occasionally so that it cools evenly.
 At this point I warmed my oven up a little. Just set it to the lowest setting and turned it off after about 5 minutes.
Once the milk cools to 110F, mix in 1-2 tablespoons of your starter, which can be any plain yogurt with active cultures. I think you can buy powdered yogurt starter too, though I'm not sure where. Now you want to "incubate" your milk and cultures. Sorry, the scientist in me is creeping in. I wrapped a towel around my container and kept the oven light on to keep it warm in the oven. I think ideally you don't want the temperature to be above 100F and you want your container to sit undisturbed for 5-7 hours.
It was soooo hard for me to not open the oven and check...
 But, I was able to exercise some restraint and checked after the 7 hours and voila, I made yogurt! It's hard to tell from the photo, but it's solid, and has a little liquid on top
.
At this point, you stir it up and refrigerate and you can be done. You've got homemade plain yogurt.
I decided to go a step further and make mine into that luscious creamy "greek" style yogurt. Basically all you do is remove the liquid by straining it through a coffee filter.
 Place the coffee filter in a colander over a pot. Add the yogurt and wait a few hours.
 It goes from this
 to this
.
So,the scientist in me can't help but do a little math. I started with 7 cups of milk, a little less than half a gallon. I ended up with 4 cups of greek yogurt. Here in W. Mass, a gallon of organic milk costs about $4.00 and would make 8 cups or a half gallon of organic greek yogurt. The greek yogurt I buy costs about $3.50 for 4 cups (32oz). So, the savings for making your own is about $3/gallon. Not a huge savings...but still something and fun to do.
The kids enjoyed helping to make and eat our homemade yogurt. We all enjoyed a bowl with maple syrup at lunch.
 I had mine with maple syrup and pecans. A yummy and healthy treat.
 Note: If you want to keep making yogurt, you should save a little each time to use as starter for the next batch.
Enjoy!
 I'd like to welcome my new friend, Janome DC2010. I've been looking at new sewing machines since right before I left for Florida. My trusty Kenmore that I've had for almost 12 years started having some bobbin problems and it was going to cost more than it's worth to fix it.
Buying a new machine was really hard for me. I sew a lot (at least when I have time) and I've had my machine for a long time. I really love my Kenmore and up until now it's done an excellent job sewing all kinds of fabrics and layers. What finally sold me on getting a Janome, who by the way makes Kenmore machines, is the customer service. I bought it at a small shop about 30 minutes from my house where I know I can go anytime I have a question or problem. Not the case with Sears.
Anyway, the timing of this post over at Noodlehead couldn't have been better. Anna's tips helped solidify what I'd already decided. If you're in the market for a new machine, take a look at her advice, and here's my 2 cents.
- My Kenmore was great! Kenmore machines are made by Janome and do a great job and are a tad bit more affordable. But, you will get essentially no customer service.
- You don't necessarily need a lot of bells and whistles, depending on what you plan on sewing. My old machine had fewer stitches than my new machine does, and the majority of them I never used.
- Get a machine with an automatic buttonhole! This was one of my few absolute requirements on a new machine. A lot of entry level machines have this feature and I definitely think it's worth spending a little extra if you have to.
 So far I'm in love with this machine.
I haven't had a ton of time to play with it....mostly because I've been playing with these 2 cuties. Florida was fun, but can't beat a good snow fort and sledding. The forecast is for more snow next week, to put on top of the 2+ feet we already have!

 Hope you're enjoying the weather where you are!
 (remember, this is for personal use only. contact me if you'd like to become a licensed seller)
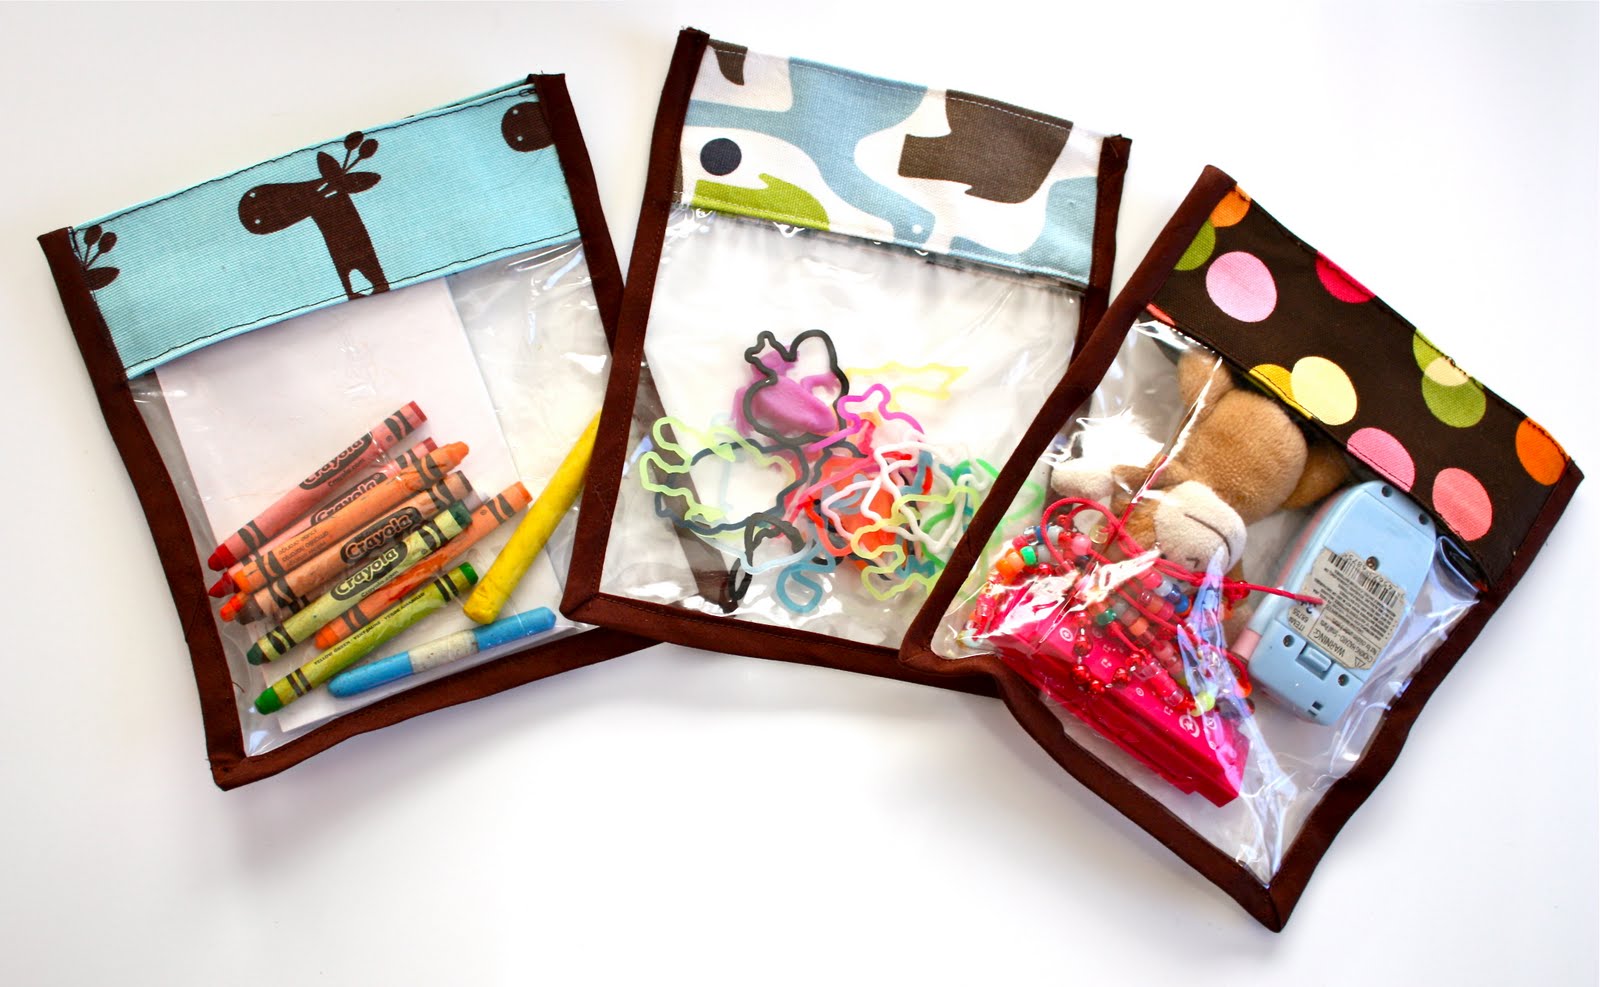
I was inspired to create these bags for my kids who are constantly asking me for plastic bags to put toys into. I'm big on eco-friendly thinking and decided they needed something more reusable than a plastic sandwich bag. So, not only are these very cute, but very functional and environmentally friendly too! (NOTE: this kind of vinyl is not food-grade and I wouldn't recommend using these bags for food!)
Here's what you need:
2 pieces of clear vinyl - 6.5" x 7" (I used a mid-weight, not sure what gauge)
2 pieces of fabric - 6" x 7"
3" piece of hook and loop tape (aka velcro)
1/2" double fold bias tape (store bought or make your own, good tutorial here)
I found that making a template and drawing a pattern was an easy way to cut the vinyl. I tried just cutting with my cutting mat and ruler and it kept slipping around.
 Next, take your fabric and fold it in half, matching the shorter sides, so you have a rectangle that is 7" wide by 3.25" tall. Press.
 Open, and fold down the long sides 1/2". Press.

 Open up the folded fabric and center the hook and loop tape about 1/2" from the top. Sew in place making sure you sew through only 1 layer of fabric ie. you should be able to re-fold the fabric and not see the seam lines on one side.
 Open up folded fabric (bag top) and align raw edge with the 7" side of a vinyl piece. Sew across, with seam allowance just short of 1/2".
 Turn so that the seam allowance and raw edge of the vinyl is sandwiched between the fabric top.
 Topstitch along the top and bottom.
 OK, now grab your bias tape, we're almost done.
Take one end of the bias tape and fold the edge to the inside. Press, refold, and press again to create a finished end.
 Starting at the top end (fabric end) of one side of the bag (sorry, I didn't get a photo of this part), sew all the way down to the bottom.
When you get to the bottom, turn the bias tape 90 degrees as pictured.
Starting at the top end (fabric end) of one side of the bag (sorry, I didn't get a photo of this part), sew all the way down to the bottom.
When you get to the bottom, turn the bias tape 90 degrees as pictured.
 Fold the tape over again and create a mitered corner. Sew along the bottom and repeat for the next corner.
 When you get to the top of the bag, cut the tape and make a finished end as you did at the start. Just make sure you leave enough bias tape so that when you fold the end, it still comes all the way to the top.
Done! Fill with toys and enjoy.
When you get to the top of the bag, cut the tape and make a finished end as you did at the start. Just make sure you leave enough bias tape so that when you fold the end, it still comes all the way to the top.
Done! Fill with toys and enjoy.


{this moment} - A Friday ritual. A single photo - no words - capturing a moment from the week. A simple, special, extraordinary moment. A moment I want to pause, savor and remember.

inspired by
soulemama
Inspired by SouleMama
A single photo - no words - capturing a moment from the week. A simple, special, extraordinary moment. A moment I want to pause, savor and remember.
 Effect created using Selective Color action from The Coffee Shop blog.

 Double boiler (can use just a regular pot, but be careful not to burn the milk)
 If you're using a double boiler, boil the water with your spoon in the pot to sterilize it. Since you're going to be leaving your milk out for 7 hours, you don't want to "contaminate" it. I don't actually know how necessary this is. I read that you should do this, but my parents don't and never have.
 Add your milk to a pot and bring the milk to 185F while stirring. If you don't use a double boiler, you have to be very careful not to burn the milk.
 Place the pan with the milk in a bowl of cold water and allow it to cool to 110F. Make sure to stir occasionally so that it cools evenly.
 At this point I warmed my oven up a little. Just set it to the lowest setting and turned it off after about 5 minutes.
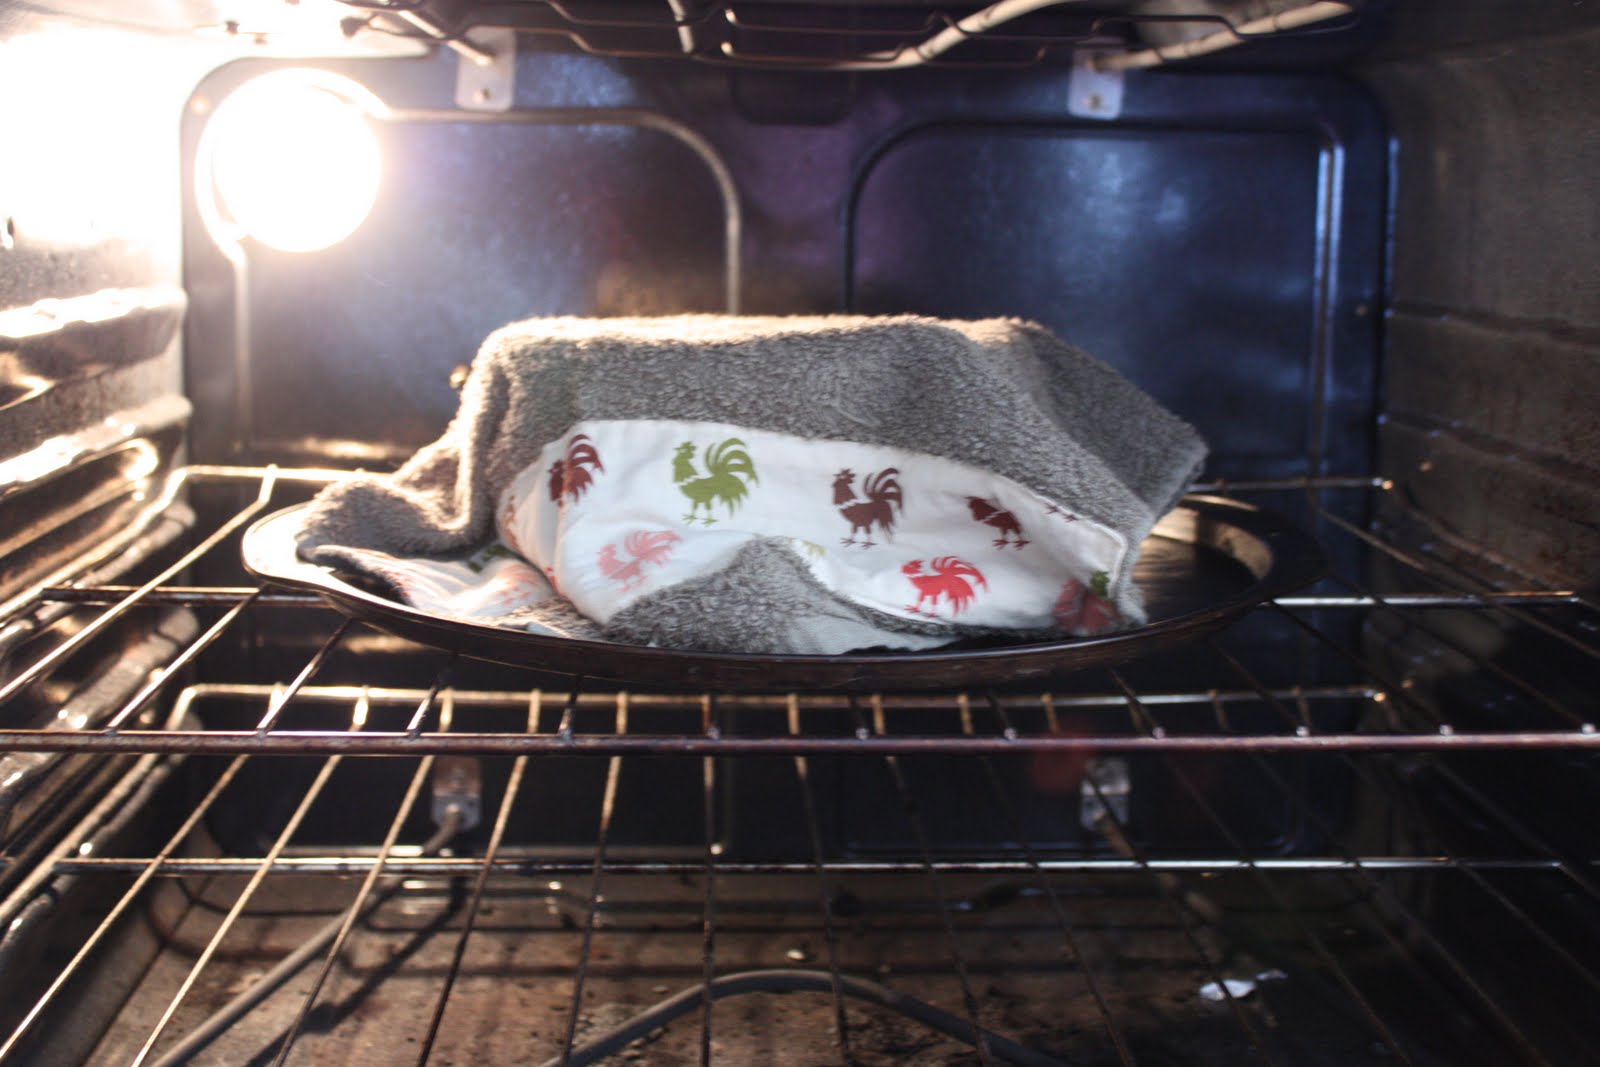 Now you want to "incubate" your milk and cultures. Sorry, the scientist in me is creeping in. I wrapped a towel around my container and kept the oven light on to keep it warm in the oven. I think ideally you don't want the temperature to be above 100F and you want your container to sit undisturbed for 5-7 hours.
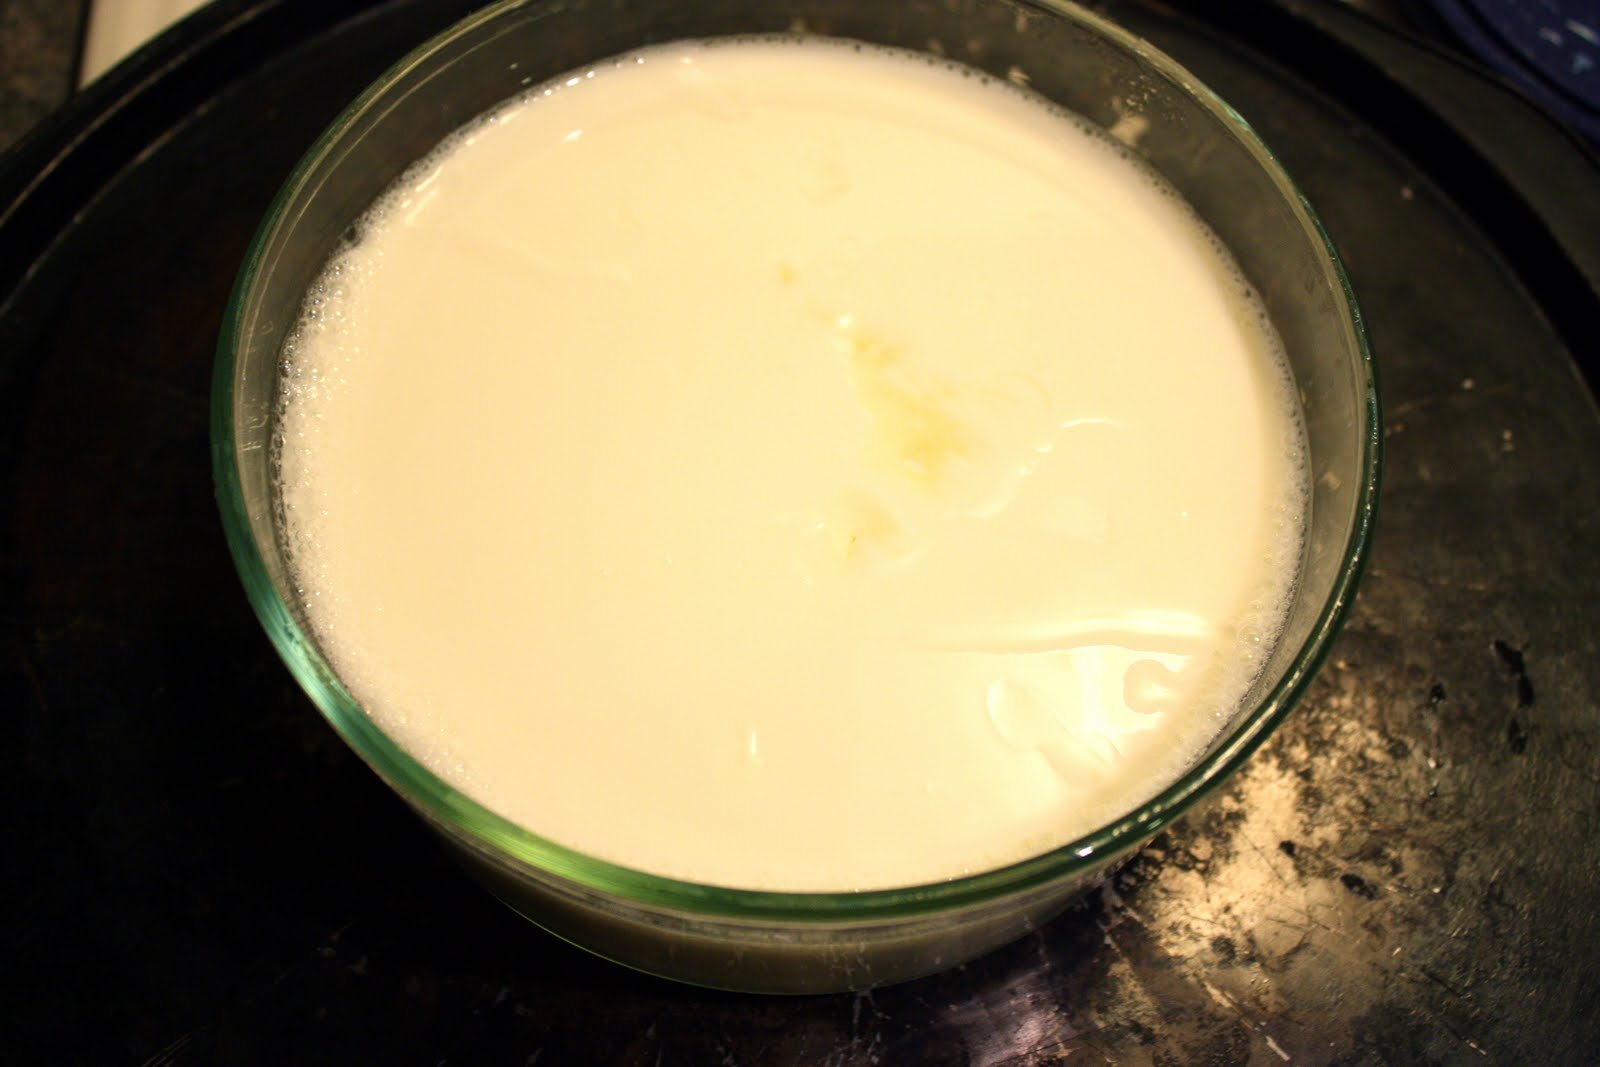 But, I was able to exercise some restraint and checked after the 7 hours and voila, I made yogurt! It's hard to tell from the photo, but it's solid, and has a little liquid on top. At this point, you stir it up and refrigerate and you can be done. You've got homemade plain yogurt.
 Place the coffee filter in a colander over a pot. Add the yogurt and wait a few hours.
 It goes from this
 to this.
 Note: If you want to keep making yogurt, you should save a little each time to use as starter for the next batch.


